How to use google drive images in a website?

We all know the power and usability of Google Drive, from saving images, to documents, to spreadsheets and basically, any types of files.
What makes Google Drive the best option for online storage is because it is free and is widely used across the globe as everyone has a google account.
For website developers, especially those who do not have much budget for their small projects, hosting static files can be an issue.
Do you know you can host your website images on Google Drive? And guess what, it's FREE!
To do it, follow the simple steps below:
Step 1
Upload your image into your Google Drive account. You can put it on a folder of your choice.

Mine is uploaded into the `Blog Files` folder on my google drive account.
Step 2
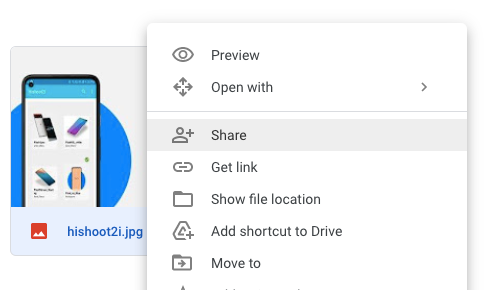
Right click on the image file and choose Get Link.
Step 3
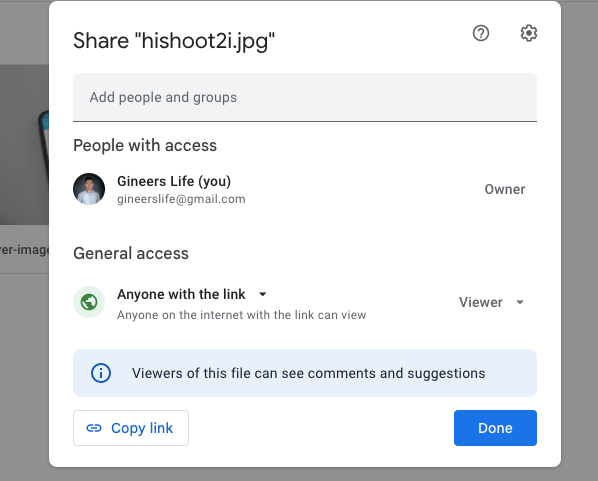
On the pop-up dialog, locate the General acess and if the value is Restricted change it to Anyone with the link.
Step 4
Afterwards, click the Copy Link and click Done.
Step 5
Get the id of the image file from the copied link. The image id is the highlighted string in the sample image link below.
https://drive.google.com/file/d/1UYTb7waddYXce-zeXua8kW-FtQDQIfi2Z/view?usp=sharing
Step 6
Paste the image id in this link https://drive.google.com/uc?id=[image-id]. So, in the example image link above, the final url of the image is:
https://drive.google.com/uc?id=1UYTb7waddYXe-zeXua8kW-FtQDQIfi2Z
You can then add this image url into your website image tag.
<img src="https://drive.google.com/uc?id=1UYTb7waddYXe-zeXua8kW-FtQDQIfi2Z" />
And there you go. Happy hosting.
Comments ()